Ever wanted a private sandbox to build, break, and master WordPress without the cost of a domain and hosting? Whether you’re a budding developer, a designer testing themes, or just curious, creating a local WordPress site is an essential skill.
Today, we’re going to discover the process and show you how to set up a fully functional WordPress website right on your own computer using a powerful tool called XAMPP.
What is XAMPP?
Think of XAMPP as a “website workshop in a box”. A real, live website needs a web server (like Apache) to handle visitor requests, a database (like MySQL) to store information, and a programming language (like PHP) to run the backend logic. XAMPP conveniently bundles all of these professional-grade tools into a single, easy-to-install package for your computer, turning it into a perfect testing server.
Let’s get our workshop set up!
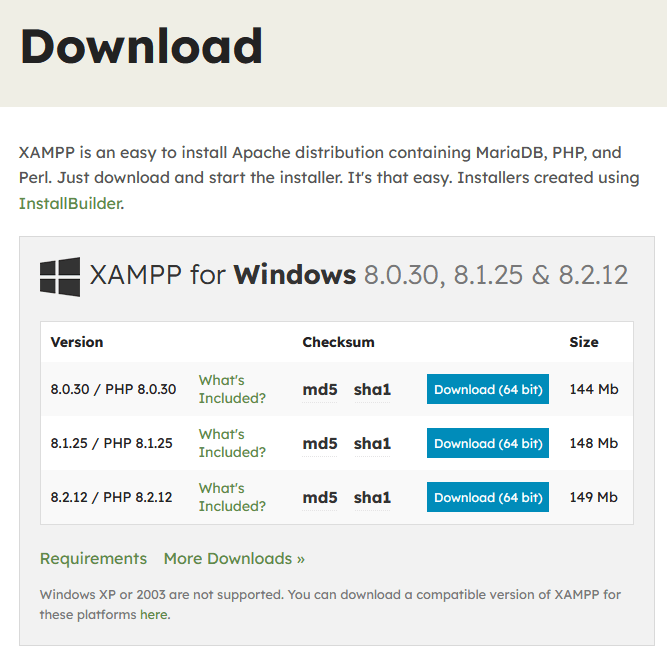
Step 1. Download and install XAMPP
First, we need to get the core software.
- Navigate to the official Apache Friends website: https://www.apachefriends.org
- Download the correct installer for your operating system (Windows, Mac, or Linux). We recommend choosing a version with a recent release of PHP (e.g., PHP 8 or higher).
- Run the installer. You can safely accept the default settings and components during the installation process.
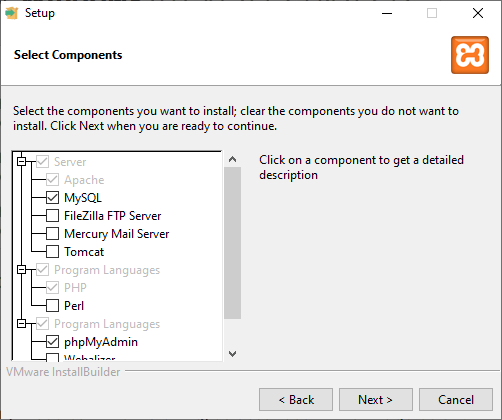
Note: You can untick all of the necessary modules while installing, as described in the image below:
Step 2. Start your server environment
Once installed, we need to “turn on the lights” in our workshop.
- Find and open the XAMPP Control Panel.
- You’ll see a list of services called “modules”. For WordPress, we only need two: Apache and MySQL.
- Click the Start button next to each of them.
- The module names should turn green, which means your local server and database are up and running!
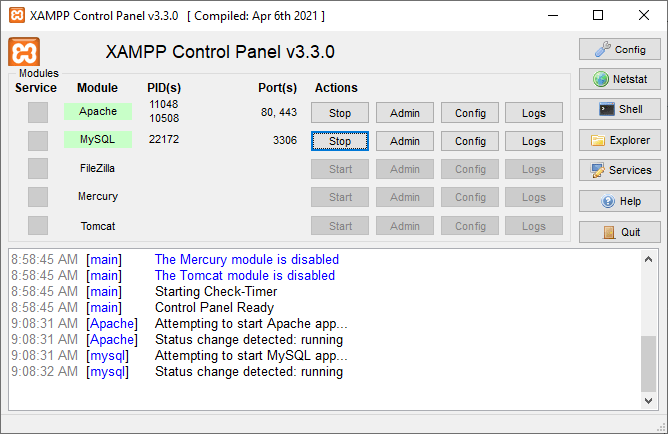
To confirm everything is working, open your web browser and navigate to http://localhost (or http://127.0.0.1). You should be greeted by the XAMPP dashboard.
Step 3. Create your WordPress database
Every WordPress site needs a database – think of it as the brain or a digital filing cabinet where all your posts, pages, user info, and settings are stored.
- In your browser, go to
http://localhost/phpmyadmin. This is the management tool for your database. - Click on the Databases tab near the top left.
- Under the “Create database” section, give your database a simple, memorable name. For this guide, we’ll use
himaridt_wp. - Leave the dropdown next to it (the collation) at its default setting and click Create.
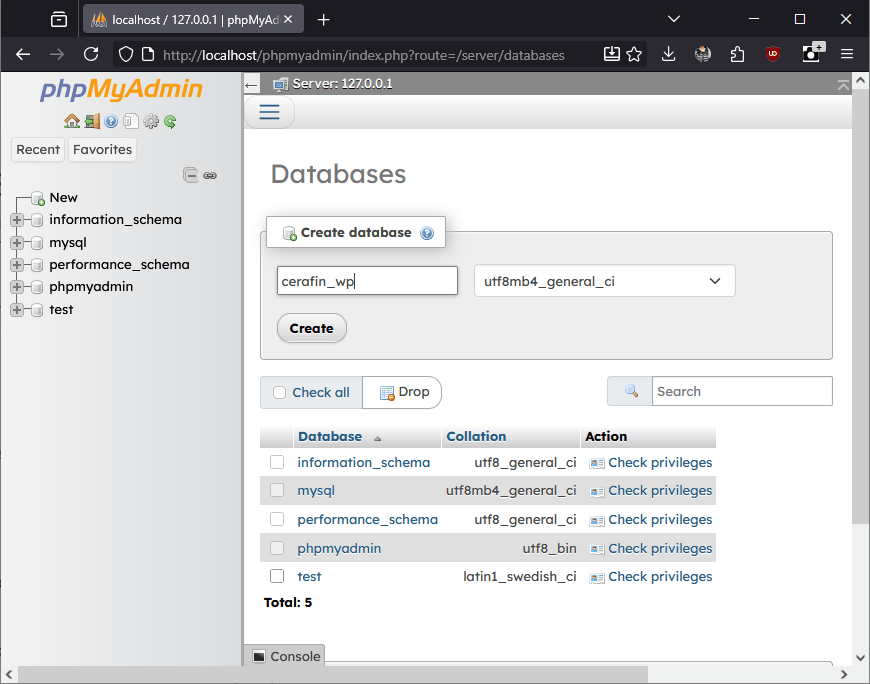
That’s it! Your empty database is ready and waiting for WordPress.
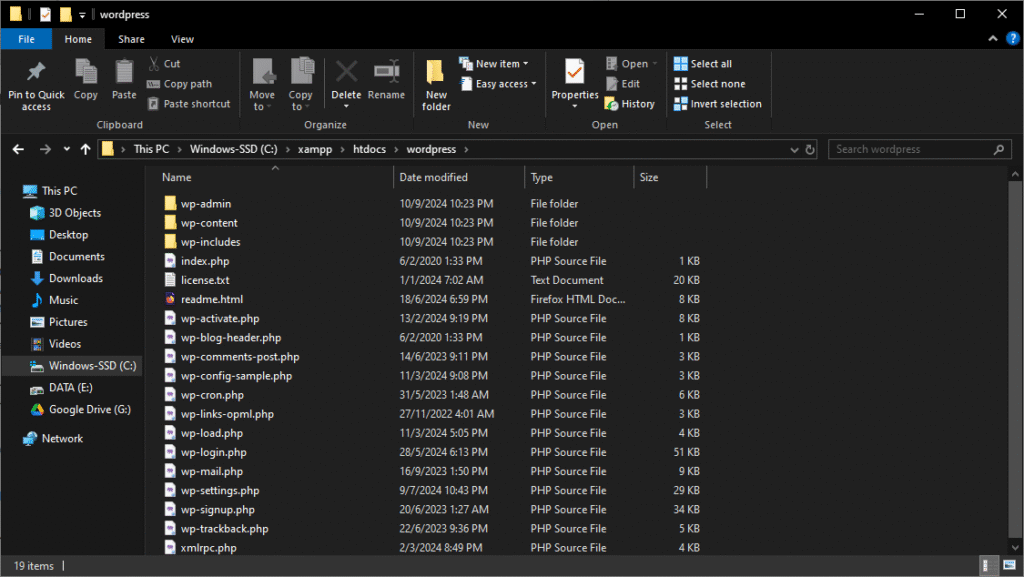
Step 4. Download and place the WordPress files
Now, let’s get the actual WordPress software.
- Head over to the official download page at https://wordpress.org/download/.
- Click the button to download the latest version, which will come as a
.zipfile. - Once downloaded, unzip the file. This will create a folder named
wordpress. - Copy this entire
wordpressfolder. - Navigate to where you installed XAMPP and find the
htdocsfolder (e.g.,C:\xampp\htdocs). This folder is the root directory for your local server – all your website projects live here. - Paste the
wordpressfolder insidehtdocs.
Pro Tip: You can rename this folder to whatever you like. The name of the folder will become part of its URL. For instance, if you rename it to myproject, you’ll access the site at http://localhost/myproject.
You can also copy the files to the root htdocs folder to access through http://localhost directly.
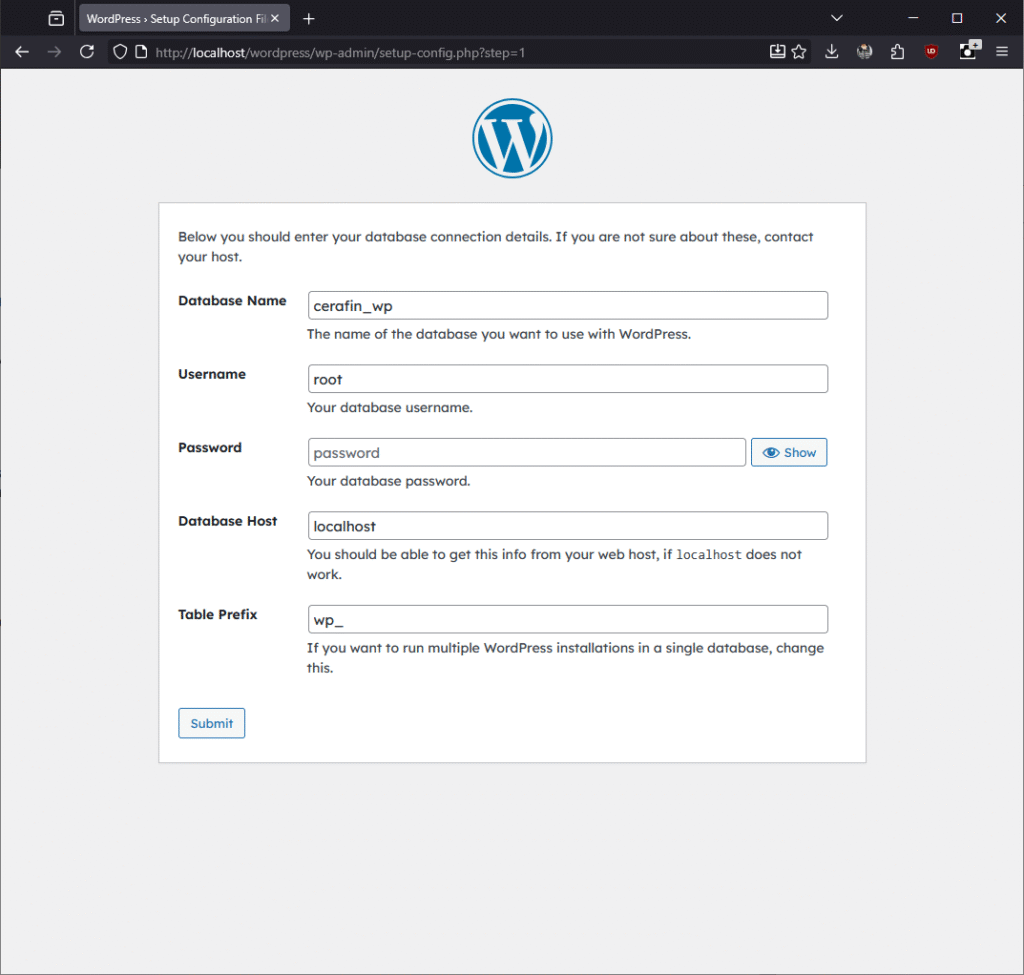
Step 5. Run the famous 5-minute WordPress installation
You’re on the home stretch! It’s time to connect WordPress to the database and set up your site.
- In your web browser, navigate to your site’s local URL. Based on our example, this would be
http://localhost/wordpress/. - The WordPress installer will launch. First, select your preferred language.
- On the next screen, you’ll be asked for your database connection details. Fill them in as follows:
- Database Name:
himaridt_wp(or whatever you named it in Step 3) - Username:
root - Password: (leave this field completely blank)
- Database Host:
localhost - Table Prefix:
wp_(it’s fine to leave this as the default)
- Database Name:
- Click Submit. If your details are correct, you’ll see a confirmation message. Click Run the installation.
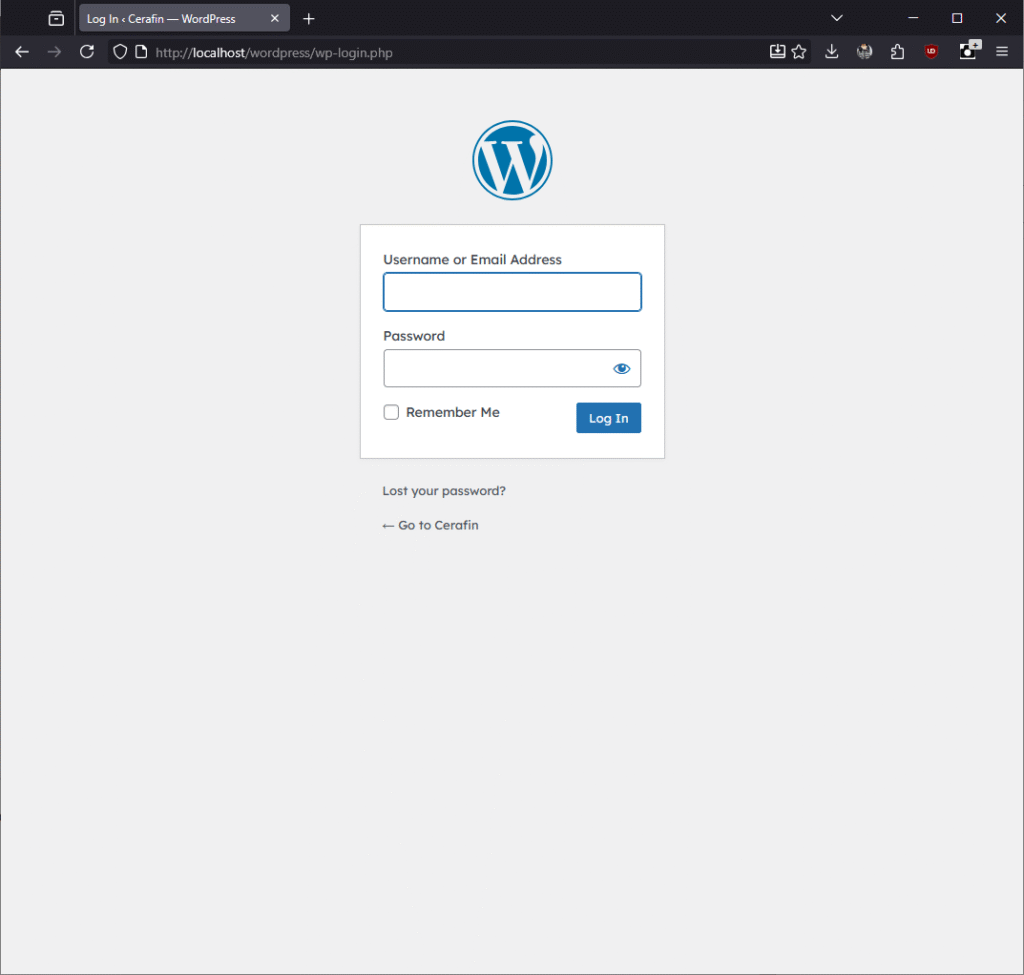
- On the final page, fill out your site’s information: give it a title, create an admin username and a strong password, and enter your email.
- Click Install WordPress.
Success! You’ve officially installed WordPress on your computer. You can now log in to your dashboard by going to http://localhost/wordpress/wp-admin.
Congratulations! You now have a powerful, private WordPress development environment at your fingertips. Feel free to experiment, install themes, try out plugins, and learn the ins and outs of WordPress without any fear of breaking anything important.
If you have any questions, drop a comment below! Happy building!
Warning!
It’s crucial to understand what this local setup is for. Running a WordPress site with XAMPP is an amazing tool for:
- Learning how WordPress works without any cost.
- Building a new website from scratch in a private environment.
- Safely testing new plugins, themes, or custom code without risking a live site.
However, you should not use your XAMPP installation to run a real, public website. Here’s why:
- Your personal computer is not configured with the advanced security measures of a professional web host and can be highly vulnerable to attacks if exposed to the internet.
- Home internet connections have slow upload speeds, which would make your website extremely slow for visitors.
- Your site would go down every time you shut down or restart your computer, or if your home power or internet goes out.
This local environment is your private workshop, not a public storefront. When you’re ready to go live, you’ll need to purchase a plan from a real hosting provider and migrate your site there.